Calibration
In Mixed Reality, it is important that your content is positioned correctly in the real world.
You want virtual objects to align with the physical space — and multiple users to see them in the same position.
Calibration ensures that your virtual content appears exactly where it should.
Connec2 uses shared calibration based on so-called Shared Spatial Anchors.
This allows a calibration to be shared with other users in the same environment.
When should you calibrate?
You may need to calibrate when:
- your content is not positioned correctly
- you are using a physical space for the first time
- no existing calibration is available
- you want to share the same Mixed Reality experience across multiple headsets
In many cases, a room only needs to be calibrated once. Connec2 therefore always tries to find an existing calibration before creating a new one.
Set up your room first
This is done outside Connec2, in the system settings of your Meta headset.
Make sure that the headset’s floor level is configured correctly and that the headset can properly recognize the physical space.
You can adjust this in your headset settings (Environment Setup → Boundary).
More information is available on the Meta website:
Set up your boundary for Meta Quest
Start calibration
You can start calibration in three ways:
Automatically
→ Connec2 starts the calibration flow when calibration is required.From your content
→ For example, by using a Calibrate Button from the XR Toolkit.From the menu
→Menu→Settings→Mixed Reality→Start Calibration
From this point onward, Connec2 guides you through the calibration process step by step.
Calibration
Search for an existing calibration
When calibration starts, a small sphere appears in front of you.
The sphere displays an eye icon with the instruction:
Searching calibration — Look around the room…
Look around the room while Connec2 checks whether a shared calibration is already available for this space.
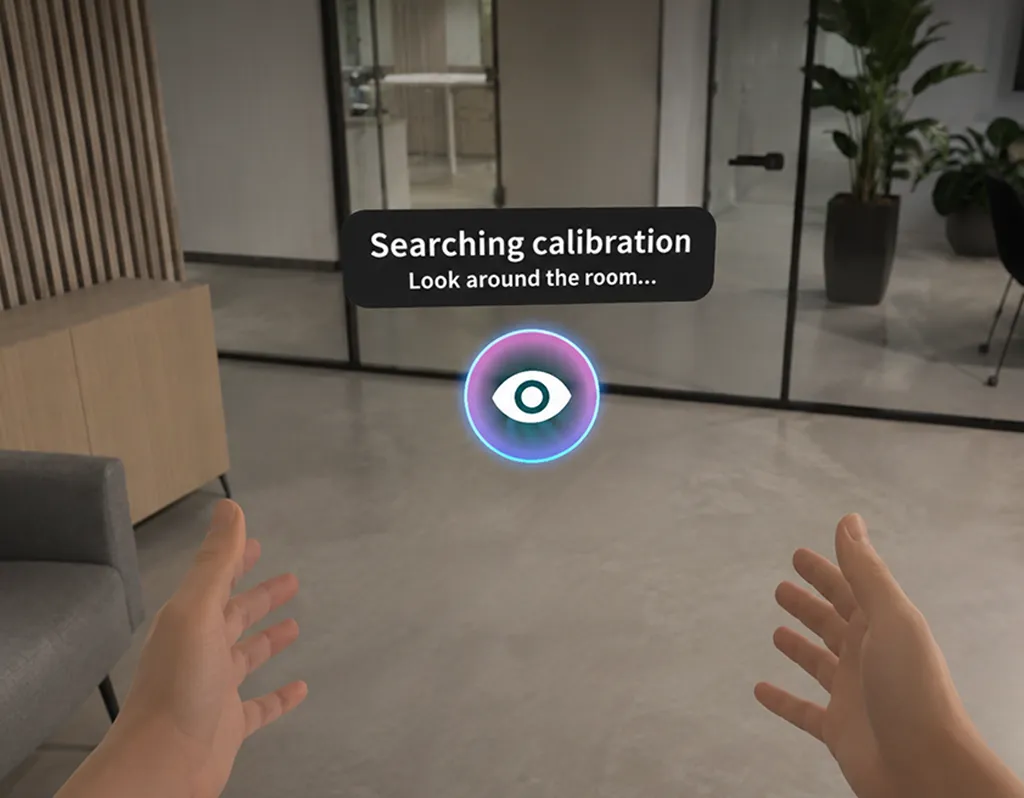
If an existing calibration is found, it can be used to position your content correctly.
Start a new calibration
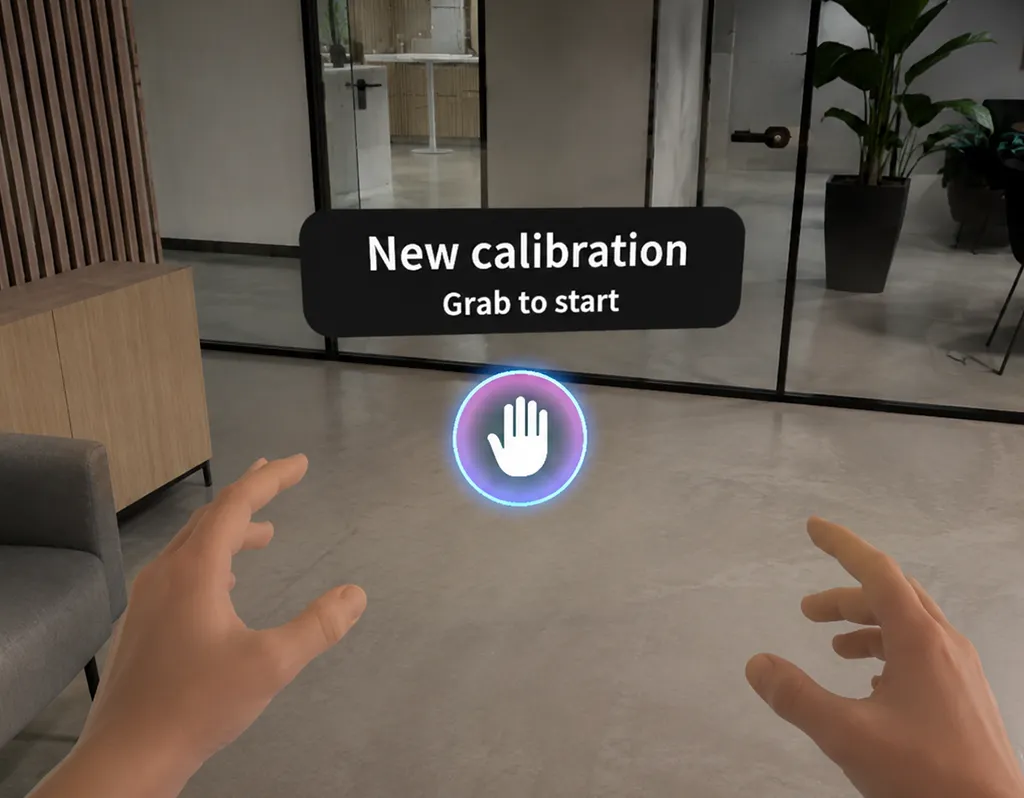
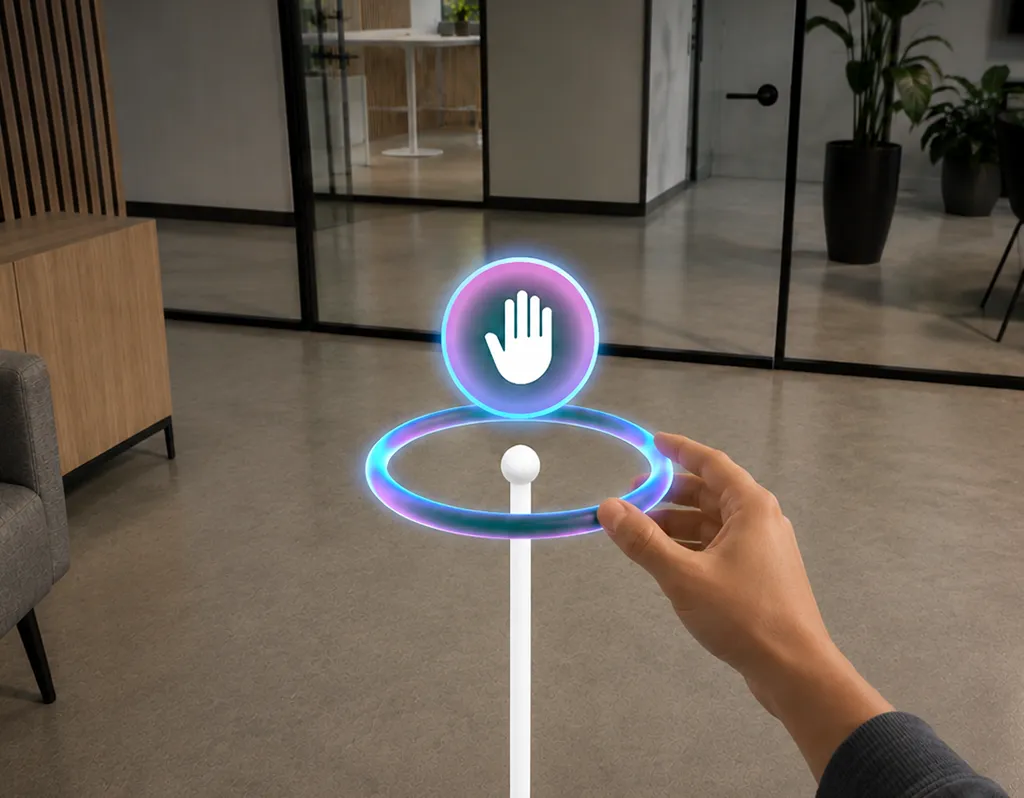
If no existing calibration is found, the icon changes to a hand and the following instruction appears:
New calibration — Grab to start
Grab the sphere to start a new calibration.
Set the floor level
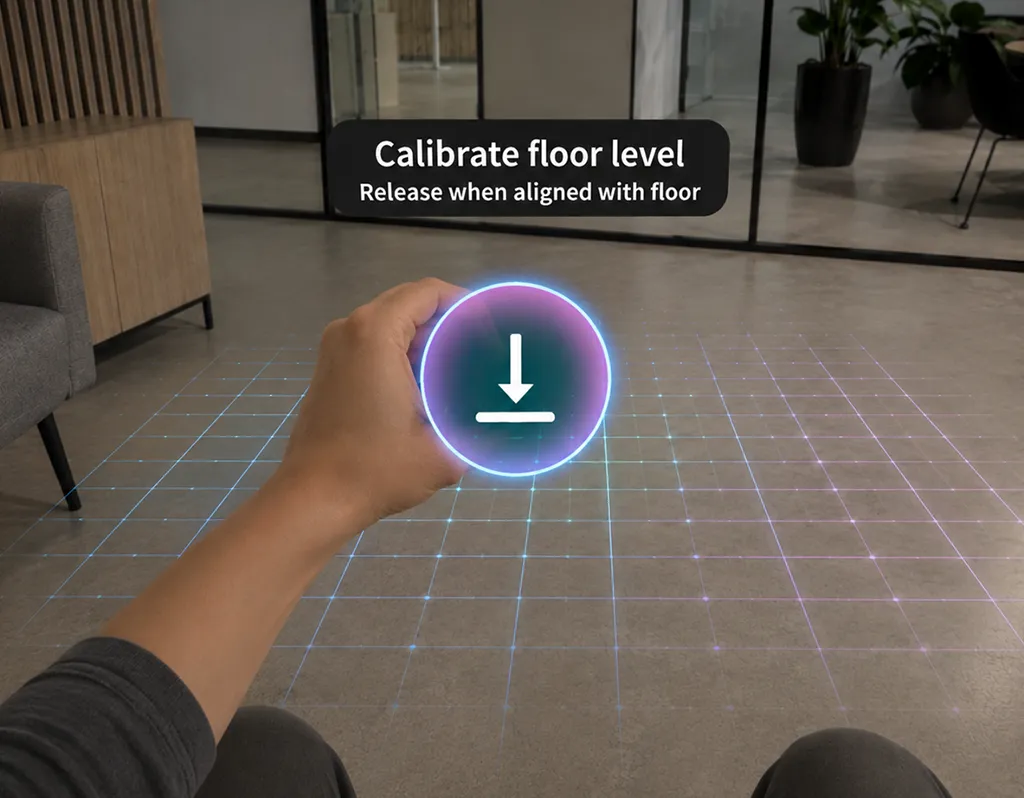
As soon as you grab the sphere, a floor icon appears with the instruction:
Calibrate floor level — Release when aligned with floor
A grid appears underneath the sphere and moves together with it.
- Hold the sphere
- Move it down toward the physical floor
- Align the grid with the floor as accurately as possible
- Release the sphere
This confirms the floor level for your content.
Set the position
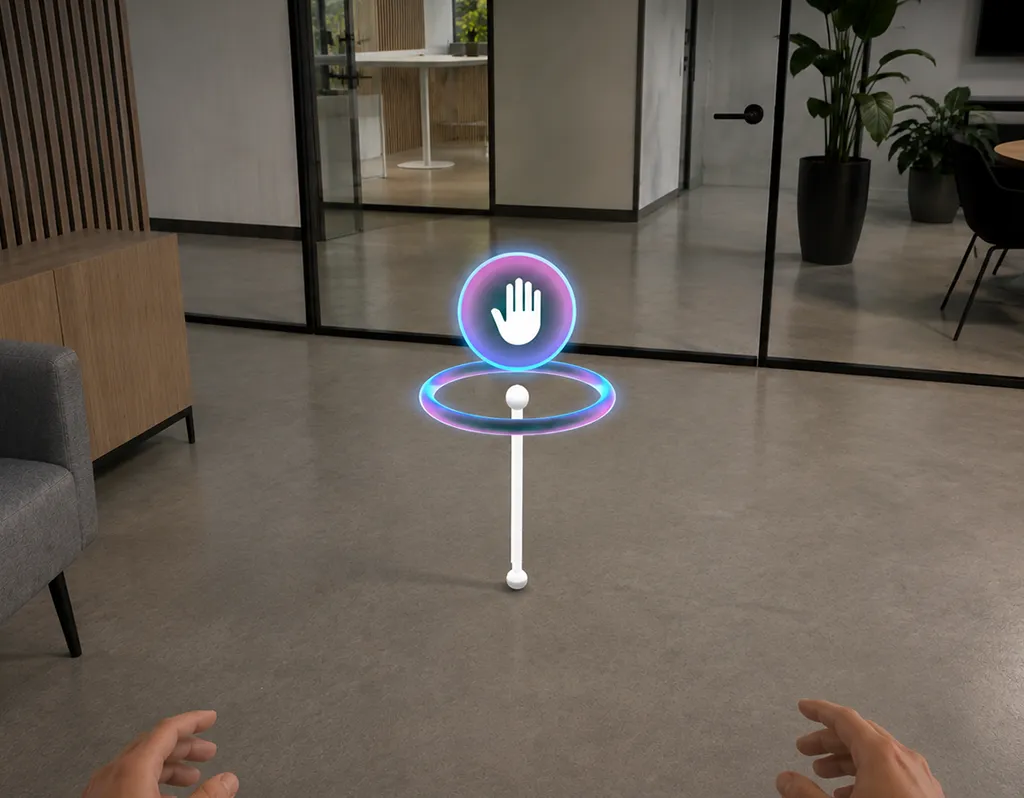
After confirming the floor level, the calibration pivot appears where you released the sphere.
Use this pivot to define the origin point of your content in the physical space.
- Grab the sphere on the pivot
- Move it to the desired position
- Release the pivot when it is positioned correctly
The origin point of the pivot corresponds to the origin point of your project.
For projects created with the XR Toolkit, this is the same as (0, 0, 0) in Blender.
Set the rotation
A ring is positioned around the pivot.
Grab and rotate this ring to determine the orientation of your content.
For example, this allows you to align a machine, training setup, or other 3D model with the desired direction in the physical space.
Review the calibration
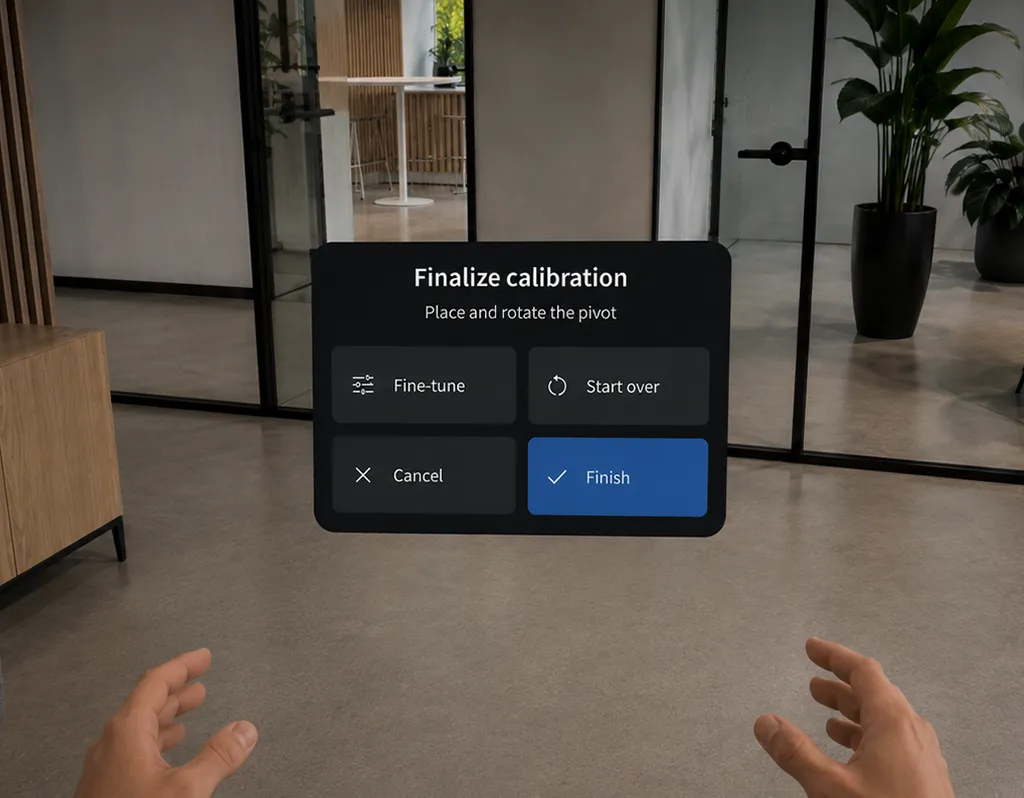
While positioning the pivot, the Finalize calibration menu appears.
The menu shows:
Place and rotate the pivot
You have four options:
- Fine-tune → precisely adjust position and rotation
- Start over → restart the calibration process
- Cancel → cancel the current calibration
- Finish → confirm the calibration
Use Fine-tune
Want to position the pivot more precisely? Select Fine-tune.
This allows you to adjust the pivot position in small increments along the three axes:
- X
- Y
- Z
Use the plus and minus buttons to move the pivot along each axis.
You can also hold a button to repeatedly move the pivot in the same direction.
The rotation of the pivot can also be adjusted in small increments.
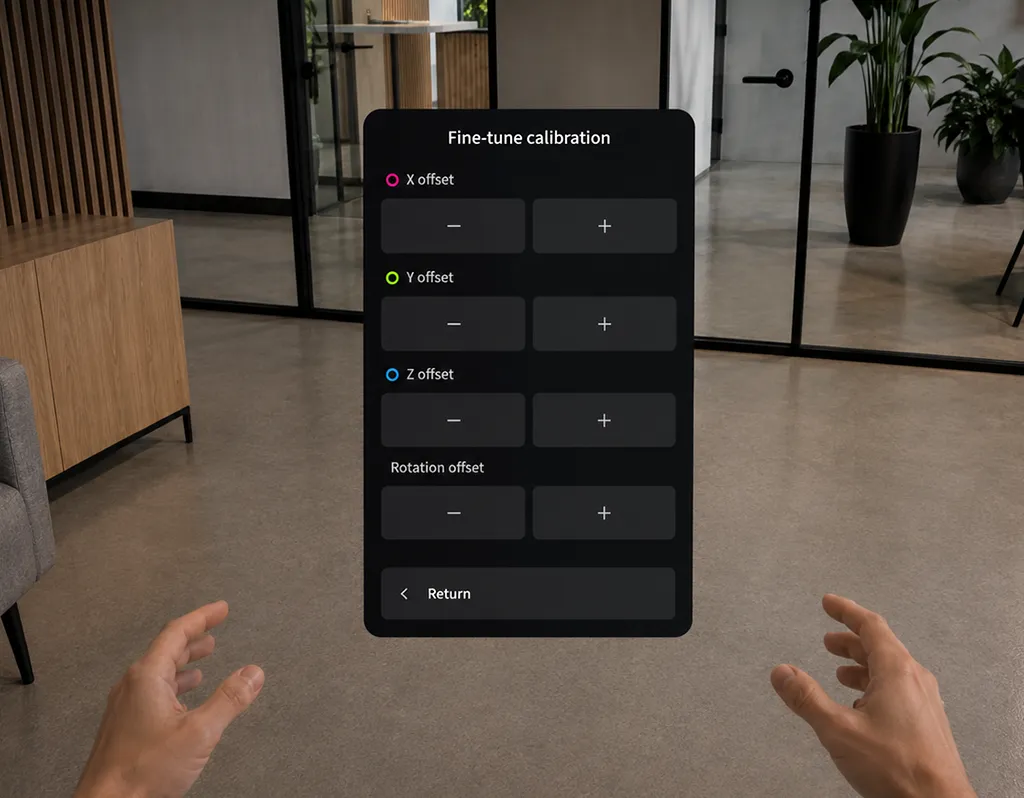
When you are satisfied, use the Return button to return to the Finalize calibration menu.
Start over
Select Start over if you want to perform the calibration again.
The pivot and menu disappear, and the calibration sphere appears again.
You then restart the process from the floor level step.
Cancel calibration
Select Cancel to stop the current calibration.
If an existing calibration was previously available, it becomes active again.
If no existing calibration is available, the calibration sphere appears again so you can start a new calibration.
Confirm calibration
When you are satisfied with the floor level, position, and rotation, select Finish.
The calibration is confirmed. A small sphere with an anchor icon temporarily appears where the pivot was positioned.
This sphere indicates the calibration status:
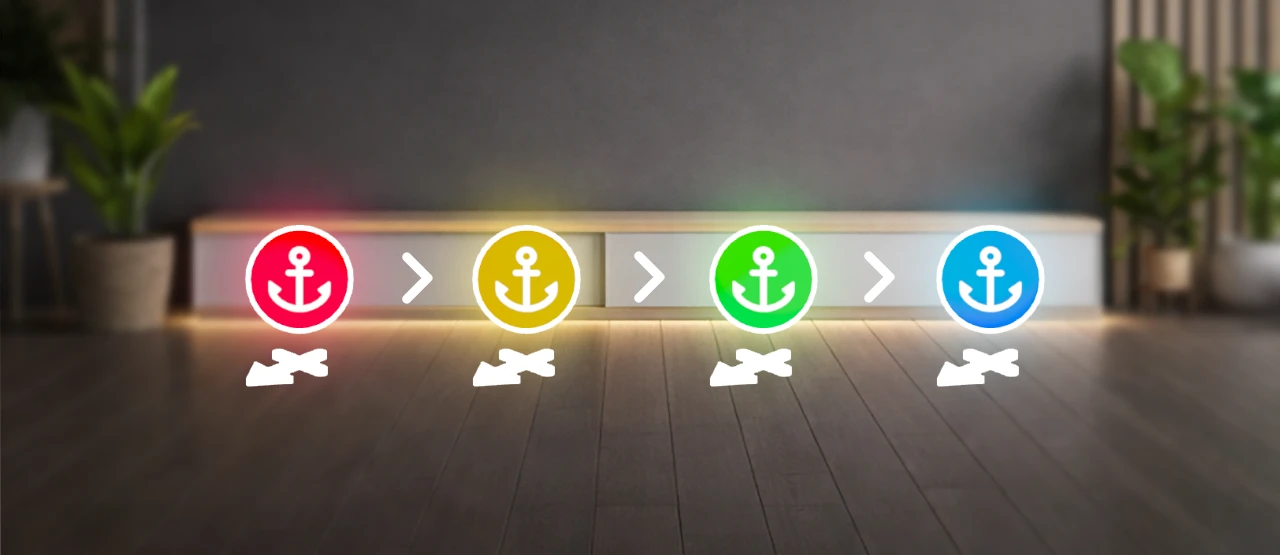
- Red → calibration failed
- Orange → calibration succeeded and is being saved
- Green → calibration is saved locally, but has not yet been synchronized
- Blue → calibration is saved and shared with other users
Once the process is complete, the sphere disappears automatically.
Using multiple headsets
After confirmation, the calibration is shared with other users by default using Shared Spatial Anchors.
This means you do not need to position every headset individually in exactly the same place.
Users who:
- are participating in the same environment
- are working within the same workspace
- and have the same Location configured in their profile
can use the same calibration.
This ensures that everyone sees the content in the same position in the physical space.