User management
This page is intended for Admins and Power Users.
Within your workspace, users work with a Connec2 account.
As an Admin or Power User, you can manage these accounts via the Management Console.
Roles
Connec2 uses roles to define what users can do.
These determine which features a user can access.
| Role | Description | Manage users |
|---|---|---|
| Admin | Full access to all features | Yes |
| Power User | Access to most features | Limited |
| User | Basic use of the environment | No |
| Guest | Access only, no features | No |
Opening the Management Console
- Go to: https://connec2.app/en/login
- Enter your Workspace ID
- Sign in with your account
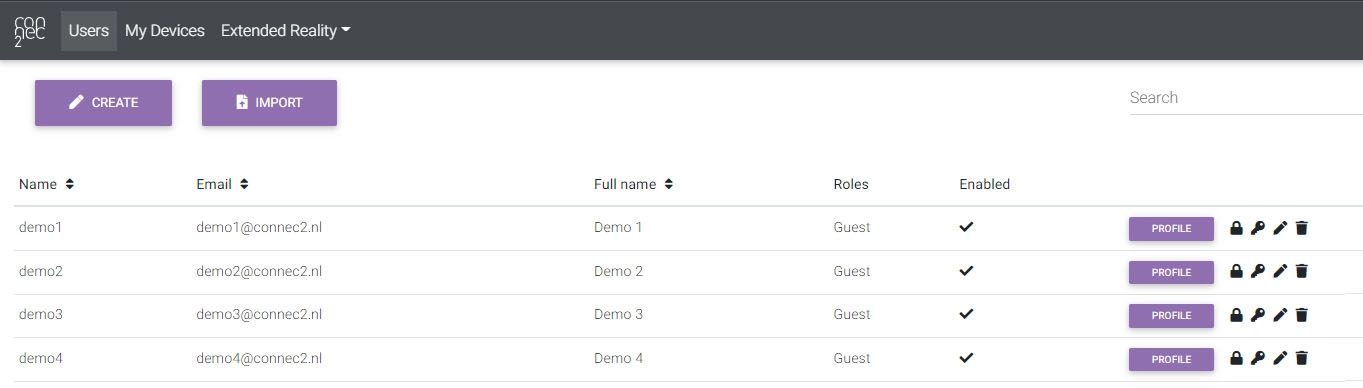
If you have the correct permissions, you will see the Users tab with all accounts.
Adding a new user
- Click CREATE
- Fill in the details
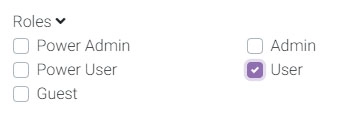
- Select a role
Editing a user
You can modify existing users using the icons in the list:
- Profile → view details
- Lock → change password (Admin only)
- Key → adjust permissions
- Pencil → edit user
- Trash → delete user
Adjusting permissions
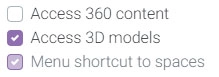
Use the key icon to adjust permissions per user.
- Unchecked → no access
- Dark checked → manually granted
- Light checked → granted via role
Permissions per role (overview)
The tables below provide an overview of the main permissions per role.
XR Client
| Section | Permission | Description | Default from |
|---|---|---|---|
| Basic | View 360 content | Load 360 content | Power User |
| Basic | View presentations | Display presentations | User |
| Basic | View 3D models | Load 3D content | Power User |
| Basic | Select remote desktop | Launch remote desktop | Power User |
| Basic | Navigate via menu | Travel using menu shortcuts | User |
| Basic | Use Smart Screens | Interact with Smart Screens | User |
| Advanced | Cinematic mode | Camera mode for recordings (PC) | Power User |
| Advanced | Restricted zones | Access restricted areas | Power User |
| Advanced | Early access features | Access experimental features | — |
Uplink
| Section | Permission | Description | Default from |
|---|---|---|---|
| Basic | 3D Editor | Access to the 3D Editor | Power User |
| Basic | Manage presentations | Upload and manage presentations | User |
| Basic | Manage 360 content | Upload 360 content | Power User |
| Basic | Avatar editor | Customize avatar | User |
| Basic | Windows Client | Launch XR Client on Windows | User |
| Basic | Host remote desktop | Share your own desktop | Power User |
| Advanced | Management Console shortcut | Shortcut to admin environment | Power User |
| Advanced | Customize branding | Adjust visual identity | Admin |
Workspace Storage
| Section | Permission | Description |
|---|---|---|
| Basic | View others’ 360 content | Access all 360 content within the workspace |
| Basic | View others’ presentations | Access all presentations within the workspace |
| Basic | View others’ 3D models | Access all 3D models within the workspace |
| Advanced | Manage others’ content | Manage/delete content from other users |
| Advanced | Export content | Export content from the workspace |
Note: This category will be replaced in the future by user-based sharing (email).
Identity Management
| Permission | Description | Default from |
|---|---|---|
| Change password | Update password via Management Console | Admin |
| Import users | Add users in bulk | Admin |
Important to know
- Permissions can be customized per user
- The highest role determines the default available features
- Additional permissions can be granted manually
You now know how to manage users within your workspace.
Last updated on