Manage Remote Desktop
With Remote Desktop, you can start sharing and controlling your desktop in VR —
just like you would in MS Teams or Zoom. It’s productive, collaborative, and easy to use!
Step 1 — Enable Remote Desktop
Press the green “Enable Remote Desktop” button to start sharing your system in VR.
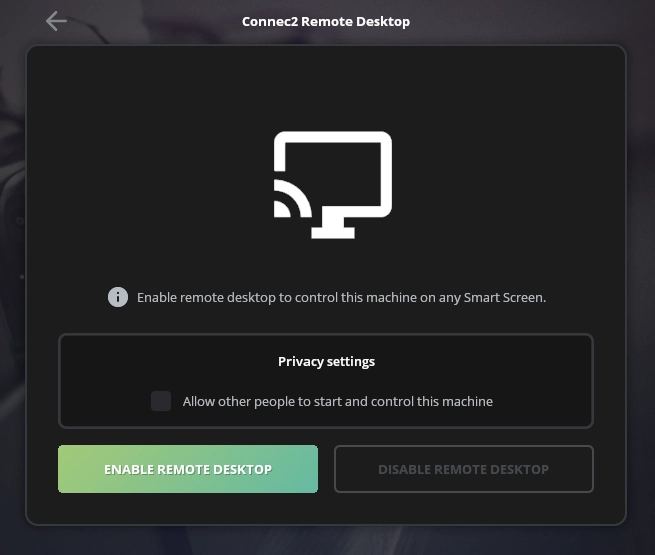
Step 2 — Manage access permissions
By default, only your account can access and control your system in VR.
If you check the box under Privacy Settings, other users can request control of your desktop.
This is useful for multi-user collaboration — for example, with shared whiteboard apps like Miro.
Note: Only one person can control a Remote Desktop at a time.

Step 3 — Recognize active sharing
When Remote Desktop is active, your screen will show a red glowing border.
Closing the screen or returning to the main menu disables sharing —
but you can safely minimize Connec2 Uplink while Remote Desktop remains active.

Step 4 — Control from Smart Screens
Once sharing is active, you can control your desktop using any of the Smart Screens
available inside your Virtual Workspace.
For a full overview of where to find and use Smart Screens, see
Connec2 Client › Virtual Workspace.
